 Korhan Köseoğlu IT Blog
İlgili Makaleler

Aşama#1: Assign opt1 and opt2 interfaces
First, assign and enable all the additional interfaces such as opt1, opt2 and so on by visiting Interfaces > (assign) option:

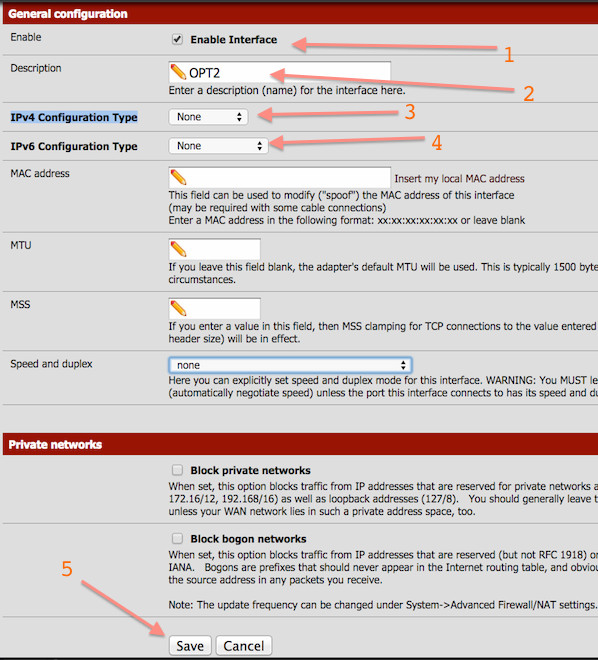
Click on each interface name such as opt1, opt2, opt3 and select “Enable Interface“. Make sure IPv4/IPv6 Configuration Type set to “None“. Finally click on the “Save” button:
Warning: Only one interface on a bridge should have an IP address. In this example, I’ve assigned IP address to lan interface (192.168.1.254). Do not add multiple IP addresses in the same subnet on different bridge member interfaces. Other interfaces on the bridge should remain with an IP type of None.
Step #2: Create a bridge interface
Visit Interfaces > (assign > Bridges option. Click on + symbol to add bridge0 and select member interfaces such as LAN, OPT1, OPT2 and so on. In this example, I’m only selecting LAN and OPT3 as member interfaces for bridge0:

My final bridge0 interface will look as follows:

Step #3: Adding a firewall rule
You need to add a firewall rule to allow traffic between each interface of the bridge. Click on Firewall > Rules > Select Lan interface. You need to select opt1, opt3 and so on. I suggest that you add a simple rule like “Default allow interface to any rule” i.e. set Protocol: any, Source: any, Destination: any > and click on the “Save” button:

Feel free to adjust firewall rules as per your needs and setup.
Kaynak : https://www.cyberciti.biz/